Posts

Posts mit dem Label "hugin" werden angezeigt.

Adolph Kaiser: Panorama Inselsberg in VR

Bild
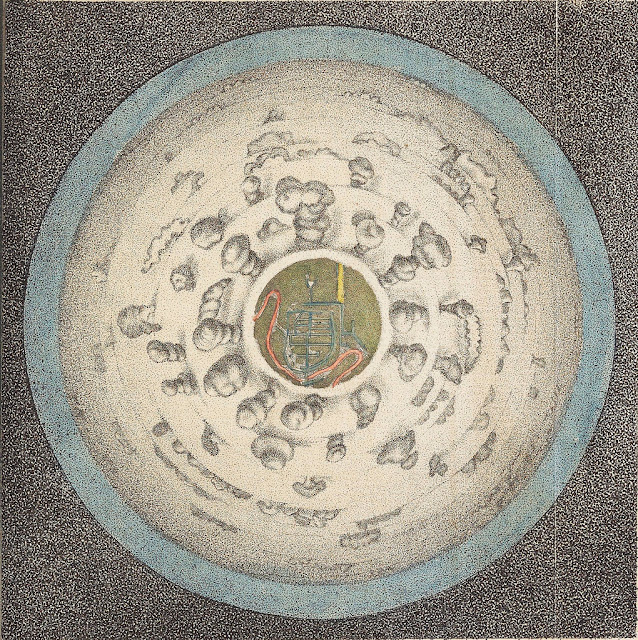
1823 Adolph Kaiser Panoramic View from the Grosser Inselsberg, Germany in VR Adolph Kaiser: Panorama Inselsberg. Bild: Klassik Stiftung Weimar This is an Adolph Kaiser panorama view from the top of the Grosser Inselsberg , the highest mountain in German's Thuringian Forest. The over 200 different locations are numerically identified within the view and correspond to an index organized in wedges surrounding the view's center. The view illustrates the mountains and trees surrounding the Großer Inslelsberg. I'd like to thank the "Klassik Stiftung Weimar" for providing me a hi-resolution scan of the image . This is the result after changing the projection with Hugin and some tweaking in GIMP : Thanks to A-Frame I can now embed it as VR view here: The result in google photos: https://photos.app.goo.gl/qNdzLtRdgzNUkaqa9 The location in open street map: https://www.openstreetmap.org/search?query=Inselsberg#map=19/50.85117/10.46638

"Hand with Reflecting Sphere" from M. C. Escher in VR

Bild
This time I stumbled across the picture "Hand with Reflecting Sphere" of M. C. Escher . Again I used more or less the steps from this tutorial: https://dablogter.blogspot.com/2019/05/tutorial-dresden-1824-inside-image-from.html 1. I removed the background with GIMP and cut out the Sphere: 2. I let hugin use his magic to create a Equirectangular panorama out of it: 3. I uploaded it to Google Photos to make it possible to view it in the browser or with my Daydream: Here the link to view the panorama with the Daydream: https://photos.app.goo.gl/dDkKrdtuBav9eDqe9 An nice alternative Android app to view panoramas is: https://play.google.com/store/apps/details?id=com.xojot.vrplayer

Even more historic images moved to VR

Bild
This two images are again more then 200 years old and now we can view them in VR. The first image is “A Circular View from the Balloon at its greatest Elevation”, featured in Thomas Baldwin’s Airopaidia (1786). https://archive.org/details/Airopaidia00Bald/page/n74 You can read more about this image here: https://publicdomainreview.org/2016/07/20/for-the-sake-of-the-prospect-experiencing-the-world-from-above-in-the-late-18th-century/ The 360x180° panorama created with Hugin and GIMP (I made the sky bigger.) Use this link to view the panorama with the DayDream: https://photos.app.goo.gl/zYjsLDvNJF4cGNzd8 The second image is on of 31 illustrations Marc-Théodore Bourrit made between 1779 and 1796. http://www2.unil.ch/viatimages/index.php?lang=en&projet=viaticalpes&module=image&action=detail&IDImage=129 The 360x180° panorama created with Hugin and GIMP (I rotated the text and filled the sky.) Again here the link to view the panorama with the ...

Inside the Dresdener Frauenkirche VR

Bild
 I used my last tutorial but this time I took an recent photo from inside the Dresden Frauenkirche I found here: https://www.flickr.com/photos/w-b-r/37537092641 (Werner Reutemann CC BY-NC-SA) The image converted to an 360x180° panorama: And now you are able so stand inside the dome of the Dresden Frauenkirche : https://photos.app.goo.gl/AkzLWgz4UH1ZNzzk7

Tutorial: Dresden 1824 - Inside an image from Carl August Richter - Improved

Bild
Thanks to this posts on twitter from Bruno Postle i have now a method how to results from the last tutorial : The first and the last steps are the same. Center the image. (Alternative you can measure the centre an enter the values in Hugin). The new thing is to use Hugin instead of the "Little Planet" plug-in in Gimp Start Hugin Change to the expert mode. (Interface->Expert) Add the image via drag and drop or this button:  Cancel this dialogue: Double click on the image: Change pitch to -90: Change the "degrees of view (v)" to 212: Here you can even the image centre shift, if you have not centred the image before in GIMP. Now go into the Preview mode: Now change the preview mode to " Stereographic":  And in the "projection" tab the "Field of View" to 360x180 Equirectangular: The preview should now look like this: Now you can go back to the "Assistnt" tab and hit the "3. Create pan...