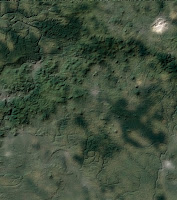
Gimp now supports the HGT file format
In the latest developer version Gimp (2.9.8) now supports the HGT file format.
So what is HGT? That’s topography data basically just containing elevation in meters of various landscape (HGT stands for “height“), gathered by the Shuttle Radar Topography Mission (SRTM) run by various space agencies (NASA, National Geospatial-Intelligence Agency, German and Italian space agencies…).
You can read more about the file format in Jehans blog:
https://girinstud.io/news/2017/12/new-format-in-gimp-hgt/
- Get Gimp >= 2.9.8.
- Get the HGT file you are interested in. I used this on: https://dds.cr.usgs.gov/srtm/version2_1/SRTM3/Eurasia/N50E014.hgt.zip
- Unzip the file.
- Open the HGT file in Gimp. It is OK, that the file is all gray. Now we have to go to the next step.
- Edit the HGT file with Colours -> Levels
Use the black and white triangles in the "Input Levels" section to show only the interesting data. To be more exact you can open the levels dialogue a second time. - Export the HGT file as JPEG. (For this example I used "N50E014.jpg")
- Create a KML file like this one:
<?xml version="1.0" encoding="UTF-8"?>
<kml xmlns="http://www.opengis.net/kml/2.2">
<folder>
<name>Ground Overlays</name>
<description>Examples of ground overlays</description>
<groundoverlay>
<name>Large-scale overlay on terrain</name>
<description>NASA elevation file</description>
<icon>
<href>N50E014.jpg</href>
</icon>
<latlonbox>
<north>50</north>
<south>51</south>
<east>14</east>
<west>15</west>
<rotation>0</rotation>
</latlonbox>
</groundoverlay>
</folder>
</kml>
Important is to change the filename to the name of the exported jpeg and coordinates in the LatLonBox
- Open the KML file in Google Earth (old Desktop Version)
- Hide everything you don't like in Google Earth.
- Export an image without the KML-Layer.
- Export an image with the KML-Layer.
- Open the first image in Gimp
- Open the second image as new layer
- Blur the first image
- Use the Bump Map filter with the second image as source


Kommentare
Kommentar veröffentlichen