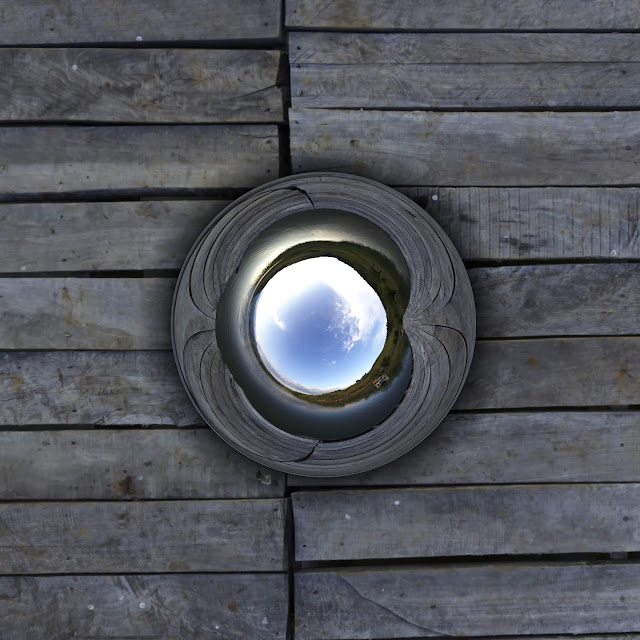
Tutorial: Creating a Chrome Ball with GIMP
This image discripes how to create this chrome ball with GIMP. First of all you need a equirectangular panorama. If you don't have one you can get one from HDRI Haven. For this tutorial I took this one:
https://hdrihaven.com/hdri/?h=bell_park_pier
I chose the 8k version (8192x4096). This will give us enough pixel for the transformations.
Now Open the image in GIMP and duplicate the layer.
Flip the new layer vertical with the flip tool. You can switch from horizontal to vertical in the tool options or by pressing the Control key.
After that scale the layer with the scale tool down to 295 pixel height.
Because reflection is never 100 percent lets darkens the image a little bit with Colors->Exposure...
Now we will create the shadow. For the shadow we need to add new layer with transparent background.
Make sure your foreground color is black. Then select the gradient tool and select the "FG to Transparent" gradient. The shape must be "Linear".
Drag the gradient from the button up, a little bit higher then the top layer. Then move the middle point of the gradient up and change the color of the middle point to FG (black).
Select the top layer and press the right mouse button. Select "New from Visible". This merges our three layers and creates a new one. This step is optional. You can even map all three layers separate. This would allow you to move the ball or the shadow later.
The last step is now "Filters->Map->Panorama Projection..."
Change "Tilt to" 90 to look straight down to the button.
This is how the final image should look like.


Kommentare
Kommentar veröffentlichen